A cardboard rack can look stable in an empty store and become unsafe within minutes. High traffic changes the forces around it. Customers brush past the corners, shopping carts catch the base, and children may lean against the display. That is why learning How to secure a cardboard rack in high-traffic areas requires more than adding weight. It requires observation, testing, and regular adjustment.
Paco Underhill, retail behavior expert and founder of Envirosell, has observed, “The way to get to know a store is to watch people shop.” His principle applies directly to rack safety. Watch where customers slow down, turn, reach, and make contact. Then place the rack outside natural walking paths, away from door swings and emergency access routes. Use a wide, level base with anti-slip pads. Add approved floor anchors or discreet tethering when the site permits them. Never exceed the manufacturer’s weight limit. Heavy products should stay low.
Check the rack before opening each day. Look for crushed corners, damp cardboard, loose supports, and a leaning frame. A small tilt can become serious near a busy checkout lane. Keep at least one clear hand width between the rack and moving carts, when space allows. This is not a perfect system. Cardboard weakens unexpectedly, especially in humid stores. A practical plan combines secure placement, visible inspection, and fast removal when damage appears. Safety should remain stronger than appearance.
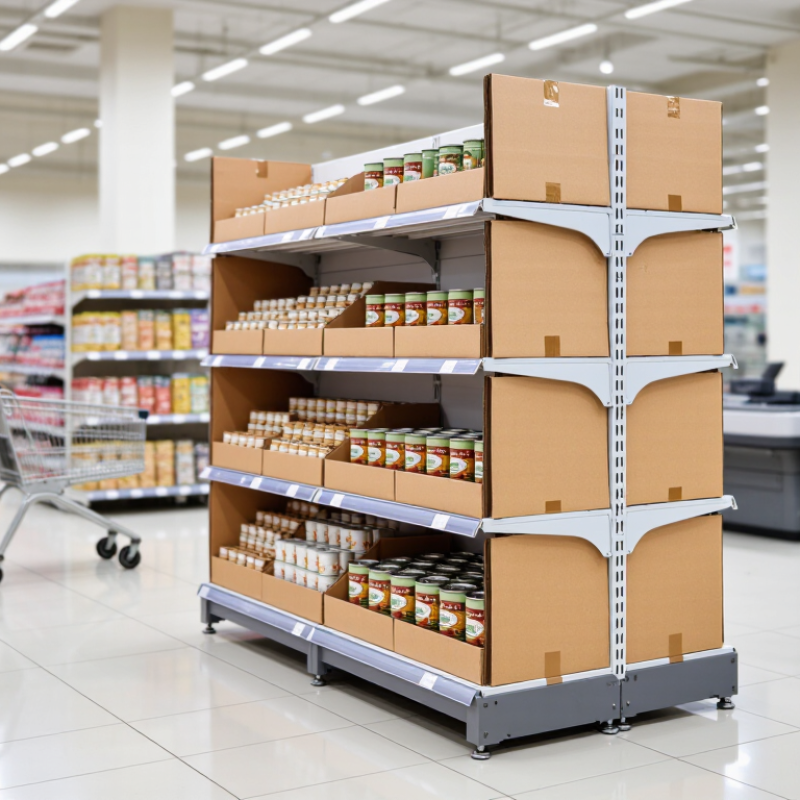
A cardboard rack becomes a hazard when customer movement is treated as an afterthought. Measure the busiest aisle during peak hours, not during a quiet opening shift. Under the 2010 ADA Standards, accessible routes should provide at least 36 inches of clear width. Keep that space continuous, including around rack corners and temporary displays.
The National Safety Council’s Injury Facts 2024 reported about 2.6 million medically consulted workplace injuries in 2022. Not every incident involves shelving, but crowded paths increase contact, trips, and rushed reactions. OSHA guidance also stresses keeping aisles and passageways clean, orderly, and unobstructed. Use a weighted base, lockable casters, and a low center of gravity. Secure the rack to a wall or floor when its structure allows it. Test it with light hand pressure before stocking it.
Place the rack outside turning zones and emergency access paths. Mark its footprint on the floor, then observe shoppers, carts, and mobility devices moving past it. A small shift matters. Recheck the 36-inch clearance after replenishment, because cartons often migrate into the aisle. This is where practice gets imperfect: staff may measure once and assume the risk is finished. Record weekly checks, after layout changes, and after any collision. When traffic remains heavy, reduce the rack’s depth or relocate it. A wider aisle is usually safer than a fuller display.
In a busy aisle, a cardboard rack faces more than product weight. People brush past it, carts vibrate the floor, and uneven loading shifts its balance. Select a rack rated for the full maximum load, not the average daily load. Check the load label, assembly guide, and supplier test documentation. A 20-kilogram shelf rating does not permit 20 kilograms concentrated in one corner. Distribute products across the shelf surface. Keep heavier packages on lower levels.
The center of gravity matters just as much as the weight rating. A tall rack filled with light boxes can still become unstable when heavier items sit above shoulder height. Keep the center of gravity low. Avoid placing dense products near the top. Measure the rack after stocking, not before. Its actual height, shelf depth, and product arrangement can change the tipping risk. In high traffic areas, use an approved anchoring method when the rack design allows it. A wide, level base also helps.
During practical inspections, I have seen staff restock quickly and create a dangerous top-heavy display. The mistake looked minor. It was not. A small gap near one side can invite leaning, while a crowded lower shelf can push products outward. Recheck the rack after delivery changes, floor cleaning, or layout adjustments. Calculations help, but they cannot predict every careless placement. That is where routine checks remain necessary.
In a busy warehouse, a cardboard rack can shift when carts, pallets, or people brush against it. OSHA 1910.176(b) requires stored materials to remain stable and secure against sliding or collapse. That rule applies to ordinary cardboard stock, not only heavy goods. The U.S. Bureau of Labor Statistics recorded 5,283 fatal occupational injuries in 2023. This broad figure is not specific to racks, but it shows why preventable workplace hazards deserve attention.
Anchor the rack to a structural wall, floor, or approved support frame. Do not rely on drywall, loose panels, or friction alone. Use fasteners rated for the substrate and follow the rack maker’s load limits. Place anchors near the rack’s upper frame, where tipping forces are greatest. Add a second restraint when traffic moves in two directions. Keep the base level, and inspect it after impacts, relocation, or floor repairs. A small wobble matters.
Leave clear aisles and maintain enough clearance for handling equipment, consistent with OSHA 1910.176(a). Store heavier cartons low, with lighter stock above them. Workers should never climb the rack or pull a jammed carton sharply. In practice, anchoring is sometimes installed correctly but checked poorly. That is an uncomfortable weakness. A monthly inspection, documented with photos and fastener checks, can expose loosened connections before a crowded aisle turns dangerous.
OSHA 29 CFR 1910.176 identifies five relevant material-handling controls: safe clearances, unobstructed aisles, marked passageways, unblocked exits, and stable storage that is secured against sliding or collapse. Each bar represents one explicit control area in the standard.
Use fire-safe corrugated materials consistent with NFPA 13 sprinkler clearances. Cardboard is combustible, even when described as fire-safe. Select corrugated panels with documented flame-spread testing, limited ignition performance, and supplier test records. NFPA 13 generally requires at least 18 inches between stored materials and sprinkler deflectors, but the exact clearance depends on sprinkler type, storage height, and commodity classification. Do not guess this distance.
NFPA’s Structure Fires in Warehouse Properties report recorded an average of 1,410 warehouse structure fires annually from 2011–2015. These fires caused approximately 159 million dollars in direct property damage each year. A crowded display can turn a small obstruction into a serious suppression problem. Keep the rack below the approved height. Mark the clearance with a visible line. Inspect it after restocking.
Anchor the rack to the floor or a stable wall where permitted. Add impact protection near carts, doors, and turning points. Keep loose cardboard away from heaters, electrical panels, and exit paths. FM Global property-loss guidance also emphasizes controlling combustible storage and maintaining sprinkler access. That guidance is practical, but not universal. Local review still matters. A licensed fire-protection professional should verify the layout, especially when the rack sits beneath storage sprinklers or near an aisle intersection. One detail is easy to miss: a low rack can still block water if its sign, canopy, or top shelf is oversized.
In busy storage areas, a cardboard rack can shift after repeated contact from carts, pallets, or workers. After every 30 days of use, inspect its anchors, load condition, and aisle clearance. Begin with the anchor points. Check for loose bolts, bent brackets, cracked flooring, or movement at the rack’s base. Push the frame gently from several sides. Any unexpected sway needs attention before the rack carries more material.
Review the actual load, not only the posted capacity. Count heavy cartons, uneven stacks, and items extending beyond the frame. Place dense products on lower levels. Keep lighter cartons higher.
A tilted shelf often shows poor distribution rather than a failed anchor. I once focused on fasteners and missed a leaning stack, which made the rack unstable. That mistake changed my inspection routine.
Measure the aisle around the rack with a clear tape measure. Confirm that cartons, wrapping material, and equipment have not narrowed the travel path. Watch door swings and turning spaces near corners. Mark the safe boundary if staff repeatedly place items too close. Record each inspection date, defect, corrective action, and the person responsible. Photographs help compare gradual movement over time. Do not rely on memory. If an anchor remains loose, remove the rack from service and request assessment from a qualified professional. Monthly checks are useful, but visible damage requires immediate action.
Choose a rack rated for its maximum expected load. Do not rely on average daily weight. Check the load label and assembly guide. Supplier test records can also help. A 20-kilogram shelf cannot safely hold that weight in one corner.
Spread products across the full shelf surface. Place dense packages on lower levels. Keep heavier items away from the top. A crowded lower shelf can push products outward. That detail is easy to miss.
A tall rack can tip even when its total weight is modest. Heavy boxes above shoulder height raise the center of gravity. Keep the load low and balanced. Check the rack after stocking. The arrangement matters.
Use an approved anchoring method when the rack design allows it. A wide, level base also improves stability. Protect the rack near carts, doors, and turning points. Floor vibration and accidental contact can shift it.
Recheck the rack after deliveries, cleaning, or layout changes. Confirm its height, shelf depth, and product position. Look for leaning, gaps, or products extending outward. Routine checks remain necessary. Calculations cannot predict every careless placement.
Select corrugated panels with documented flame-spread and ignition testing. Treat cardboard as combustible, even when described as fire-safe. Keep loose cardboard away from heaters and electrical panels. Do not depend on marketing language alone.
Keep stored materials at least 18 inches below sprinkler deflectors when applicable. The required distance can vary with sprinkler type and storage conditions. Do not guess the clearance. Mark it with a visible line. Inspect the line after restocking.
Yes. An oversized sign, canopy, or top shelf can obstruct water distribution. Keep the rack below the approved height. Maintain clear access around sprinklers and exit paths. A low display is not automatically safe. I would verify the layout with a qualified fire-protection professional.
How to secure a cardboard rack in high-traffic areas starts with evaluating pedestrian flow, nearby equipment, and potential impact points. Keep aisles at least 36 inches clear under ADA guidance, and position the rack where it will not obstruct exits, walkways, or emergency access. Choose a rack rated for its maximum expected load, distribute products evenly, and keep heavier items low to maintain a stable center of gravity.
Anchor the rack securely to a suitable wall, floor, or support structure to reduce the risk of tipping during routine activity, consistent with OSHA 1910.176 material-handling principles. Use fire-safe corrugated materials and maintain appropriate clearance below sprinkler systems in line with NFPA 13 guidance. After every 30 days of use, inspect anchors, rack surfaces, product weight, stability, and aisle clearance. Repair, reinforce, or reposition the rack whenever wear, overloading, or shifting is observed.

D-Strom Rack